
December 2014
Binary Ice Clock
This clock is very similar to my first electronics project I made which was also a binary clock. My first one was made with discreet components and didn't use any fancy RTC's or Arduino's. 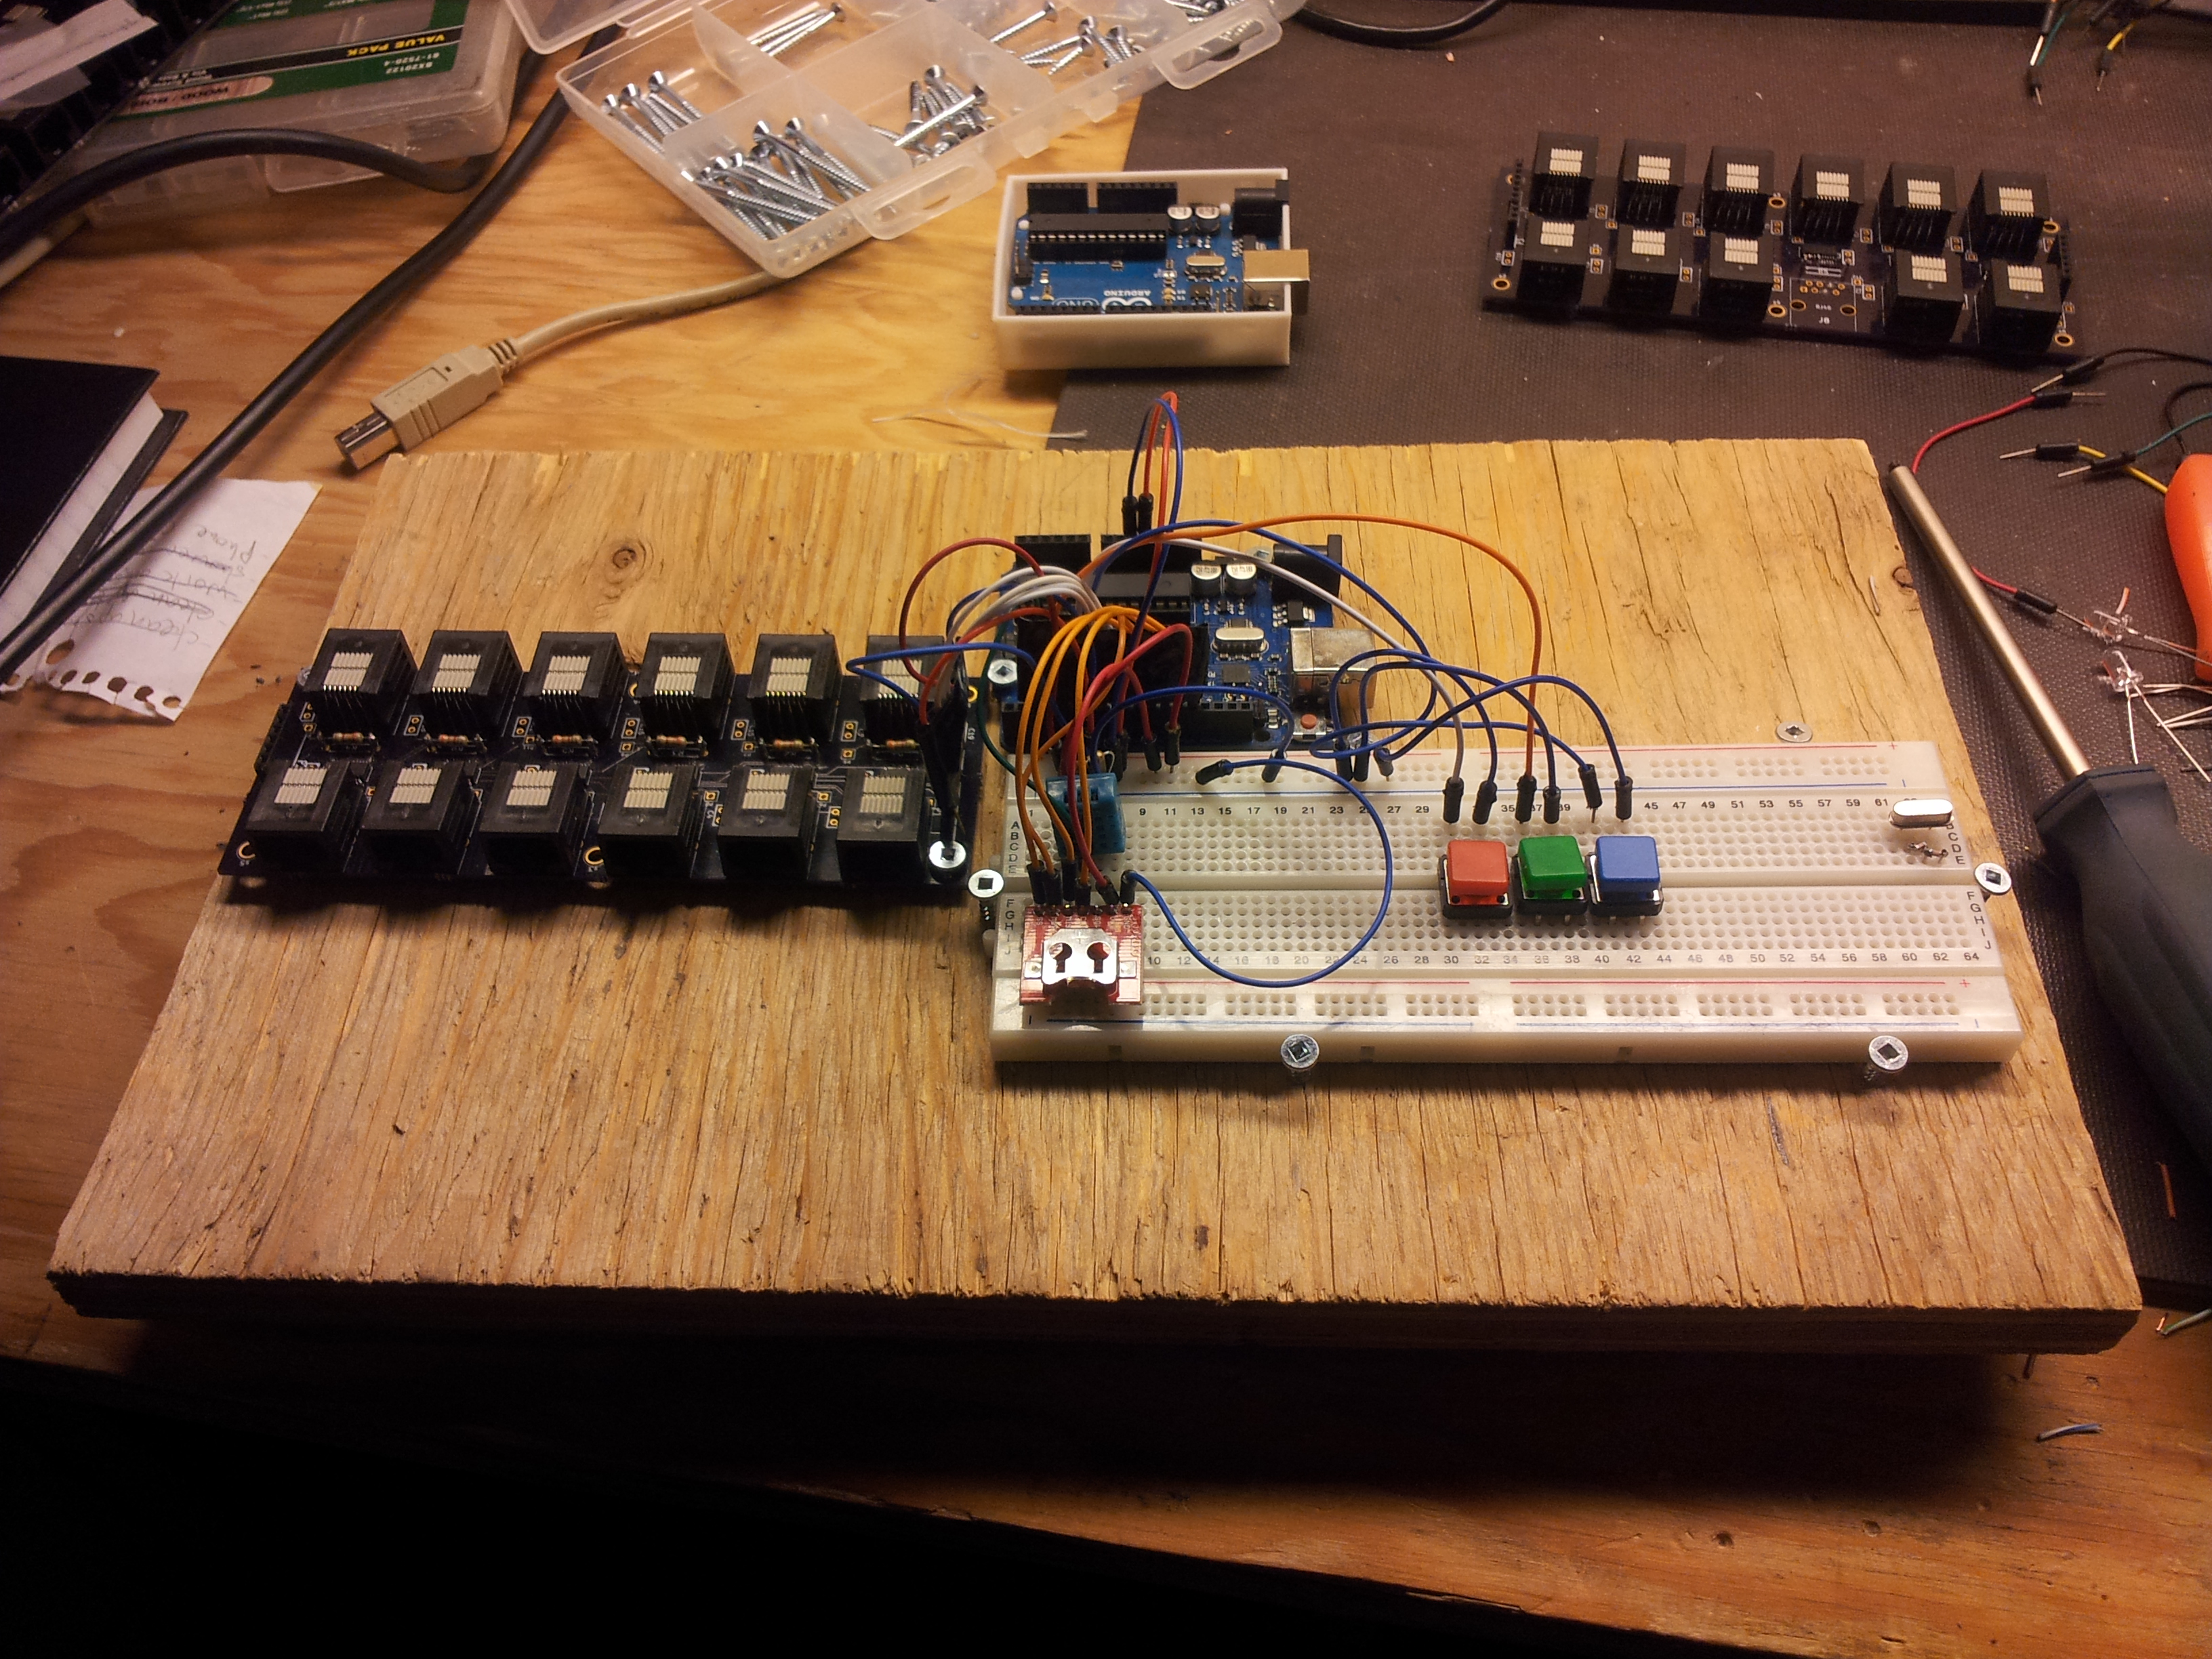 
This binary clock made out of ice blocks was a fun and easy project. I've had this idea for a couple of years now but never had time to build it when winter was around. This year I took the winter off from work so I had lots of time for fun projects like this. I started by collecting a bunch of empty margarine containers and using them to make cylindrical ice blocks. Some of the blocks broke apart as they were freezing so I just placed them together on the snow and poured some water over top of them until they were frozen together. With all the ice blocks made I started on the wiring harnesses. This took more time then I expected. I had to strip, measure, and cut all the wires before terminating them with LEDs and RJ45 plugs. To drive the LEDs I'm using a custom board that I designed and had made at OHS Park. It's basically a breakout board for TLC59282's. I've got 6 TLC59282's on the board so I can use it to control up to 96 LEDs. Each TLC59282 has it's outputs broken out to two RJ45 connectors. Only seven LED are on each connector because pin 8 is used for a common power. With the wiring harnesses done I breadboarded the whole circuit. I used a TLC59282 test program that I had written earlier to test the LEDs. Once they worked I wrote the binary clock code. I used a real time clock (RTC) from sparkfun to keep time. It uses a DS3234 SPI RTC with temperature compensated crystal oscillator. With everything working I mounted the electronics to a piece of plywood and put it in a cooler. I wanted to keep the electronics out side so I didn't have to have cables running inside. The cooler should keep the electronics safe outdoors. I ran the cables out of the cooler thru the drain spout. I drilled 5/16” diameter holes in to the bottom of all the ice blocks, about an inch deep, so I could insert the LEDs.  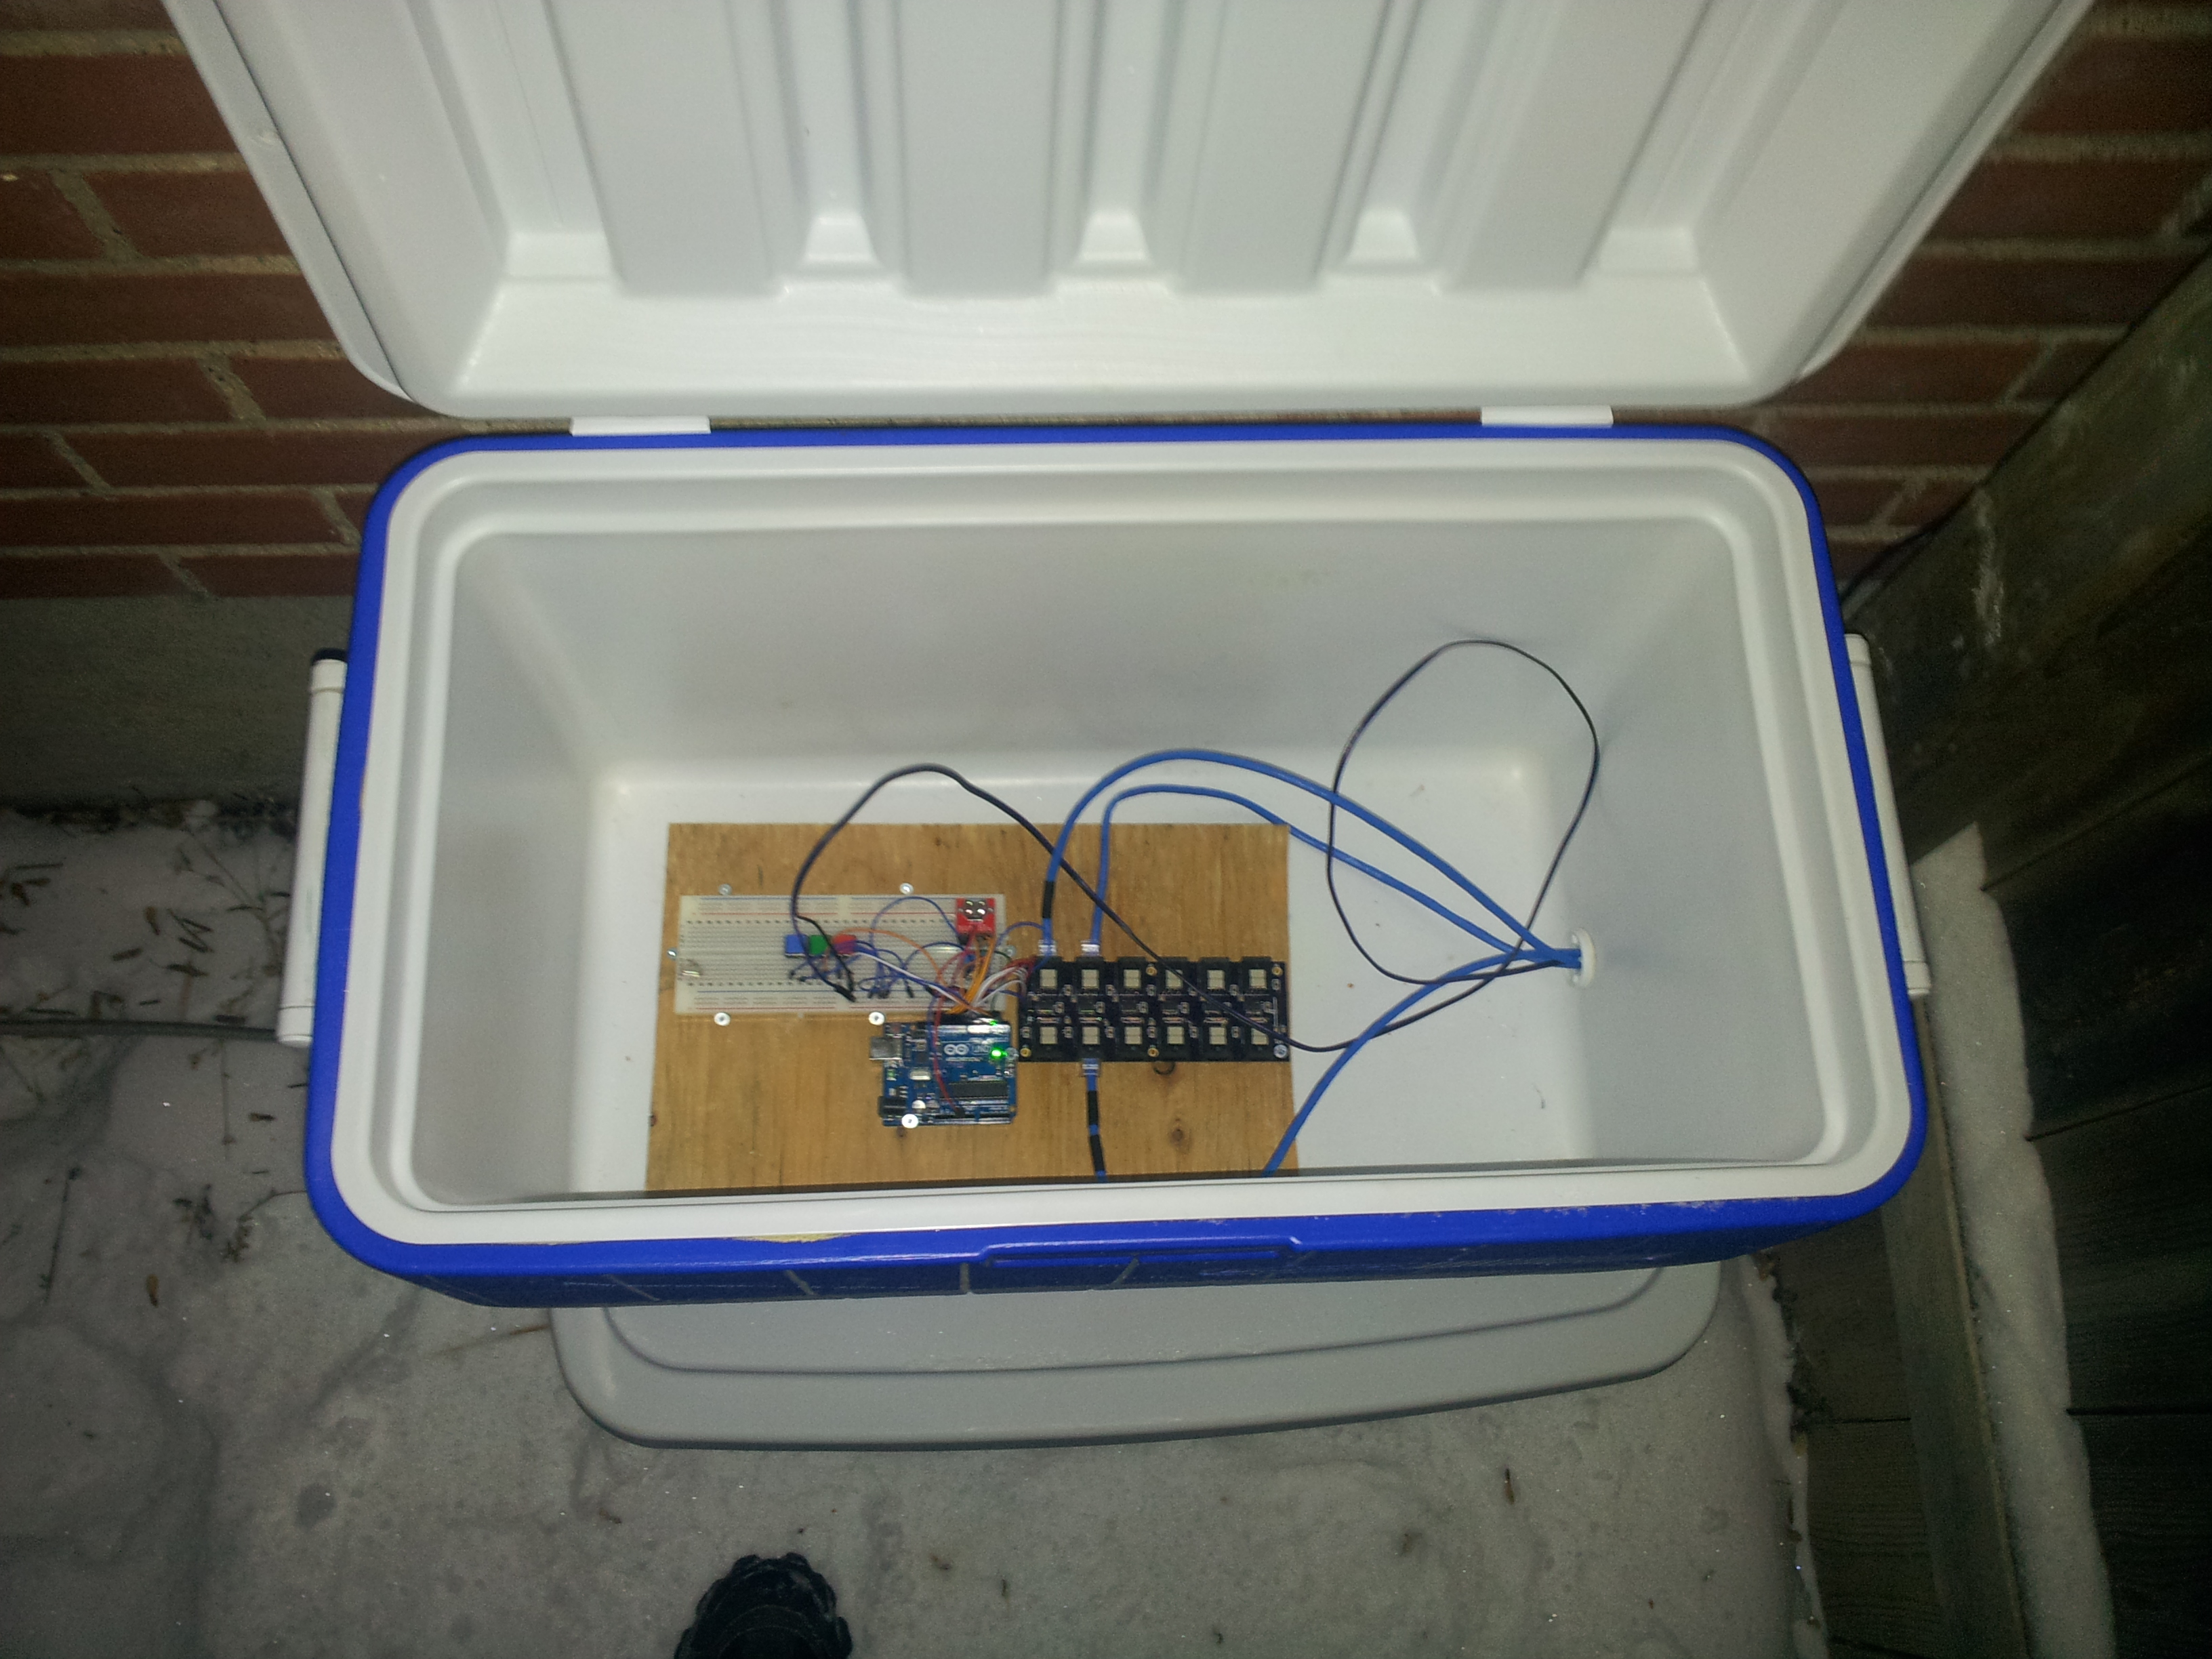 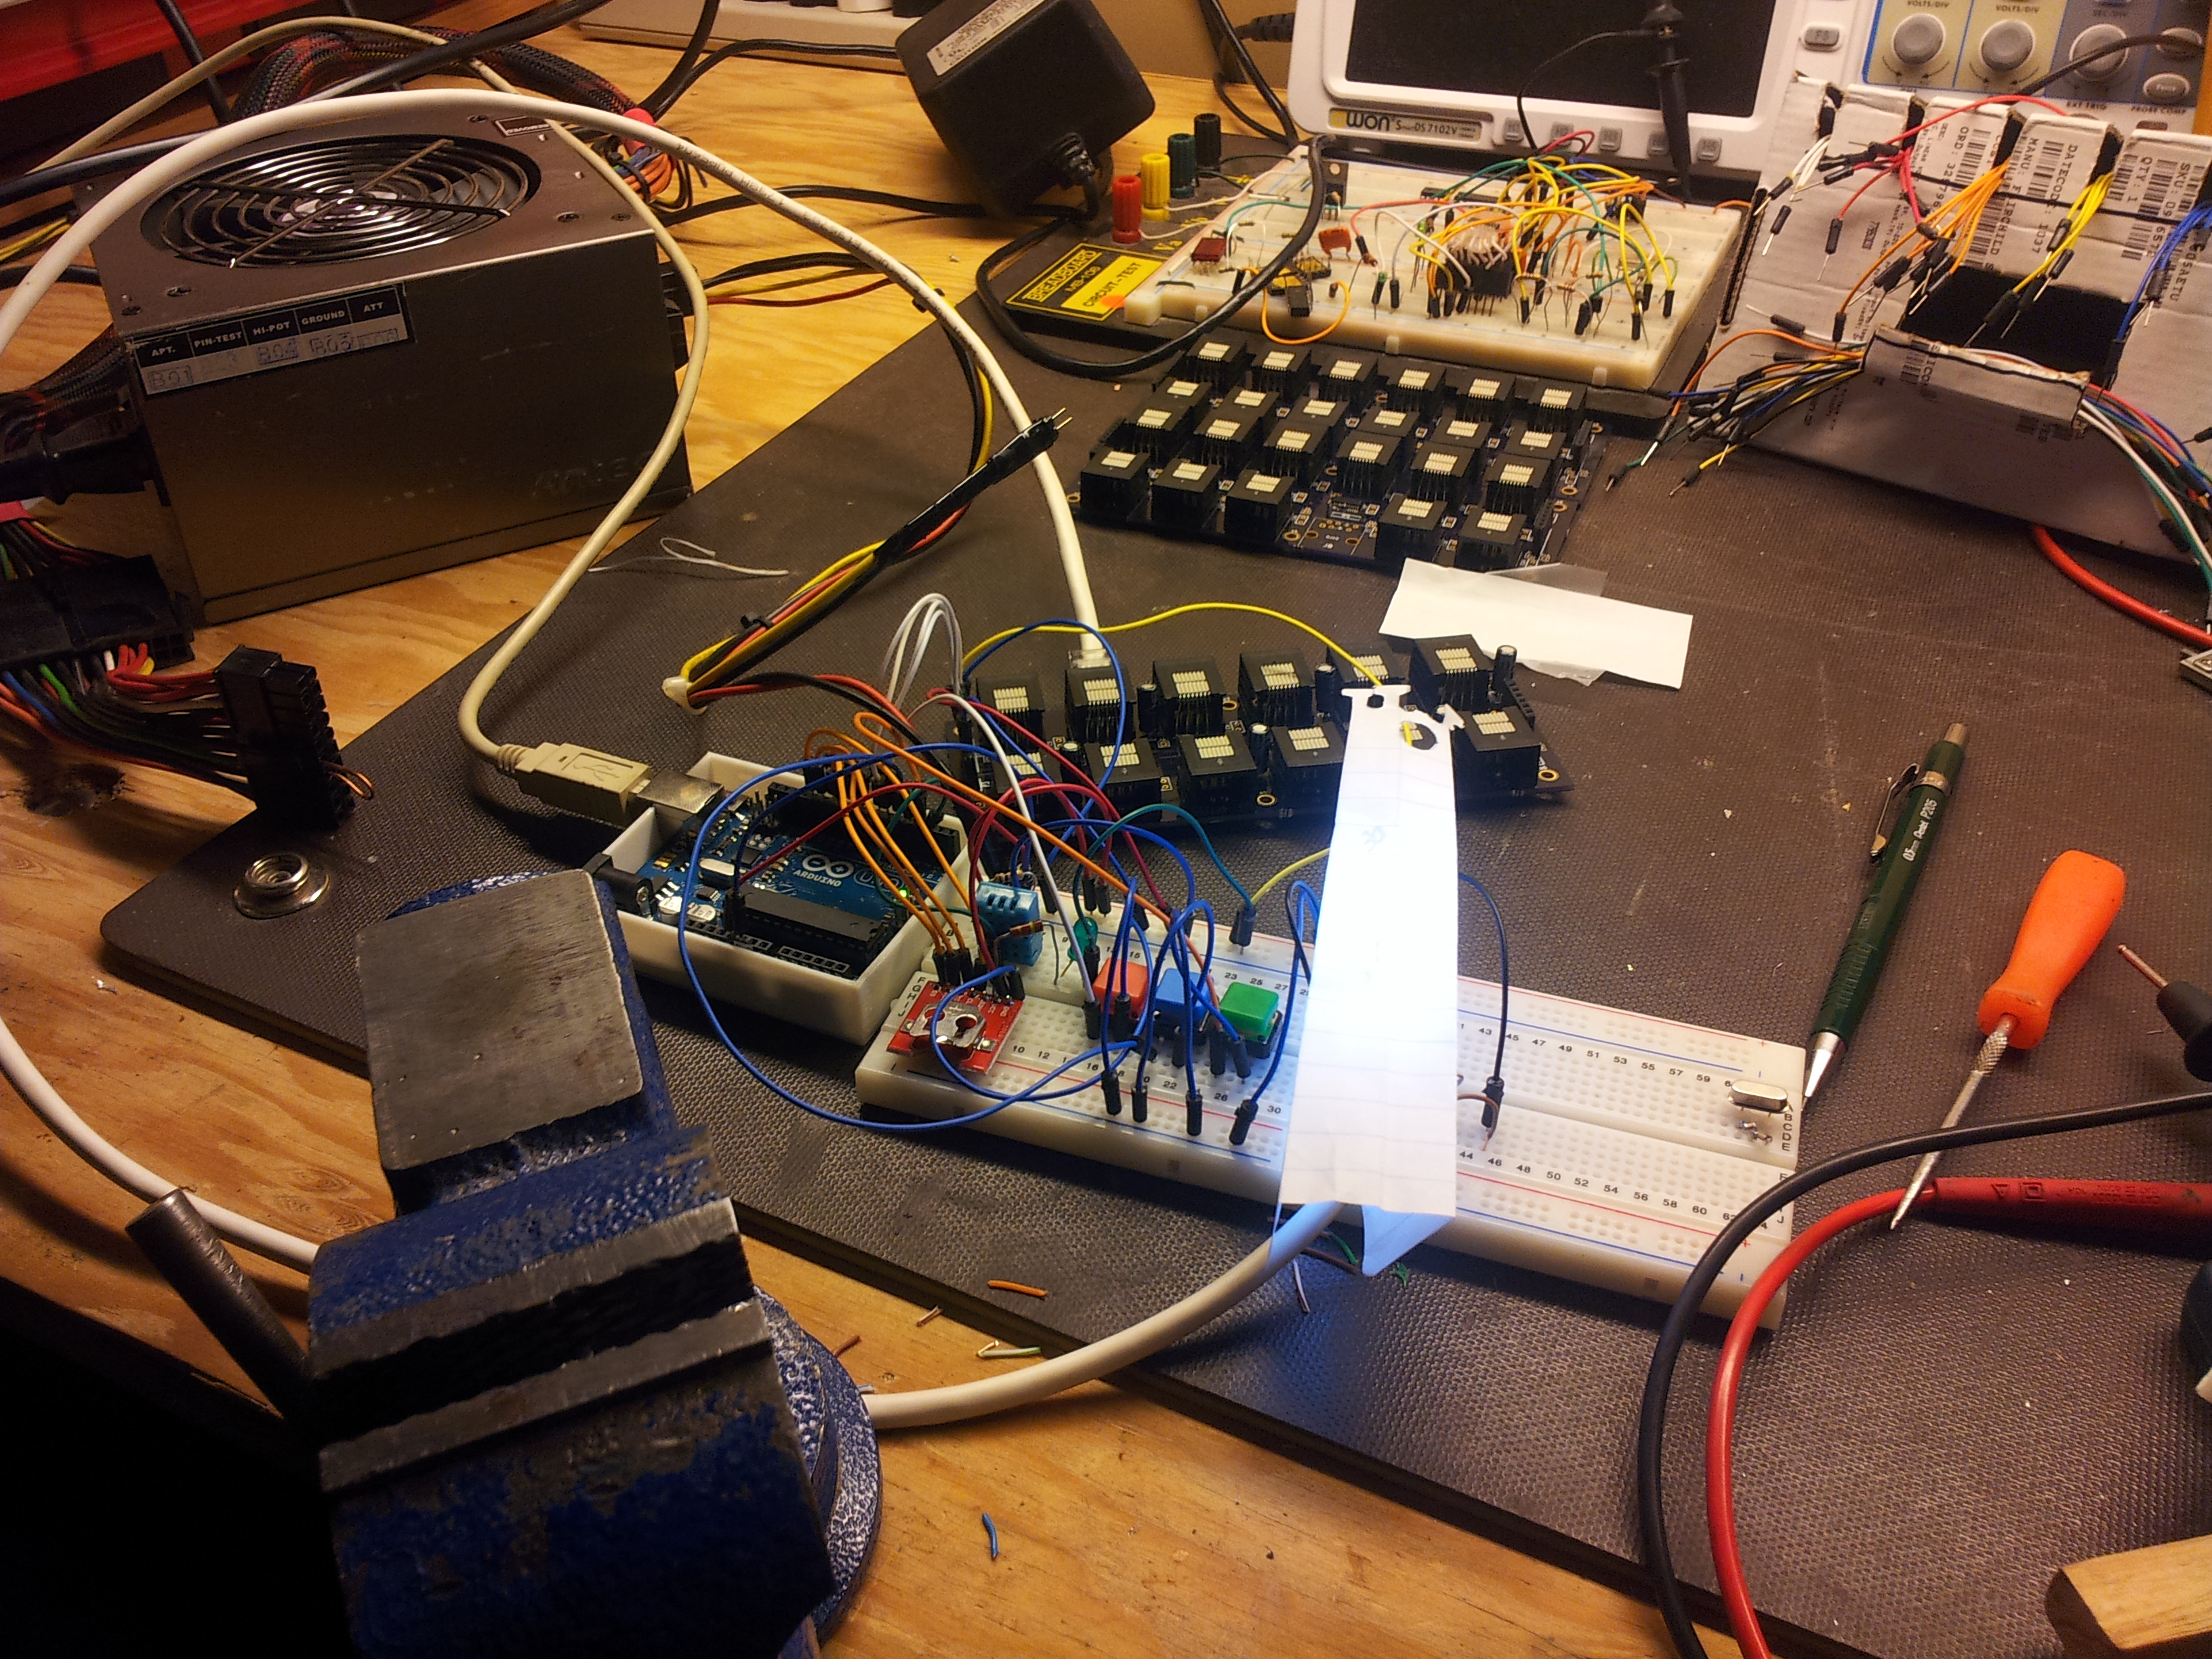
I had previously placed a platform outside and used snow and water to freeze it in place. This would be the solid base that I could build my clock on. With everything ready I went outside with all the LED harnesses, the ice blocks, and a bucket of water and started building. I inserted an LED in every block and used snow to hold it in place. Then I stacked the ice blocks up with more snow and water. Once everything had hardened I poured more water over the whole display and used snow to fill in the gaps between the blocks. 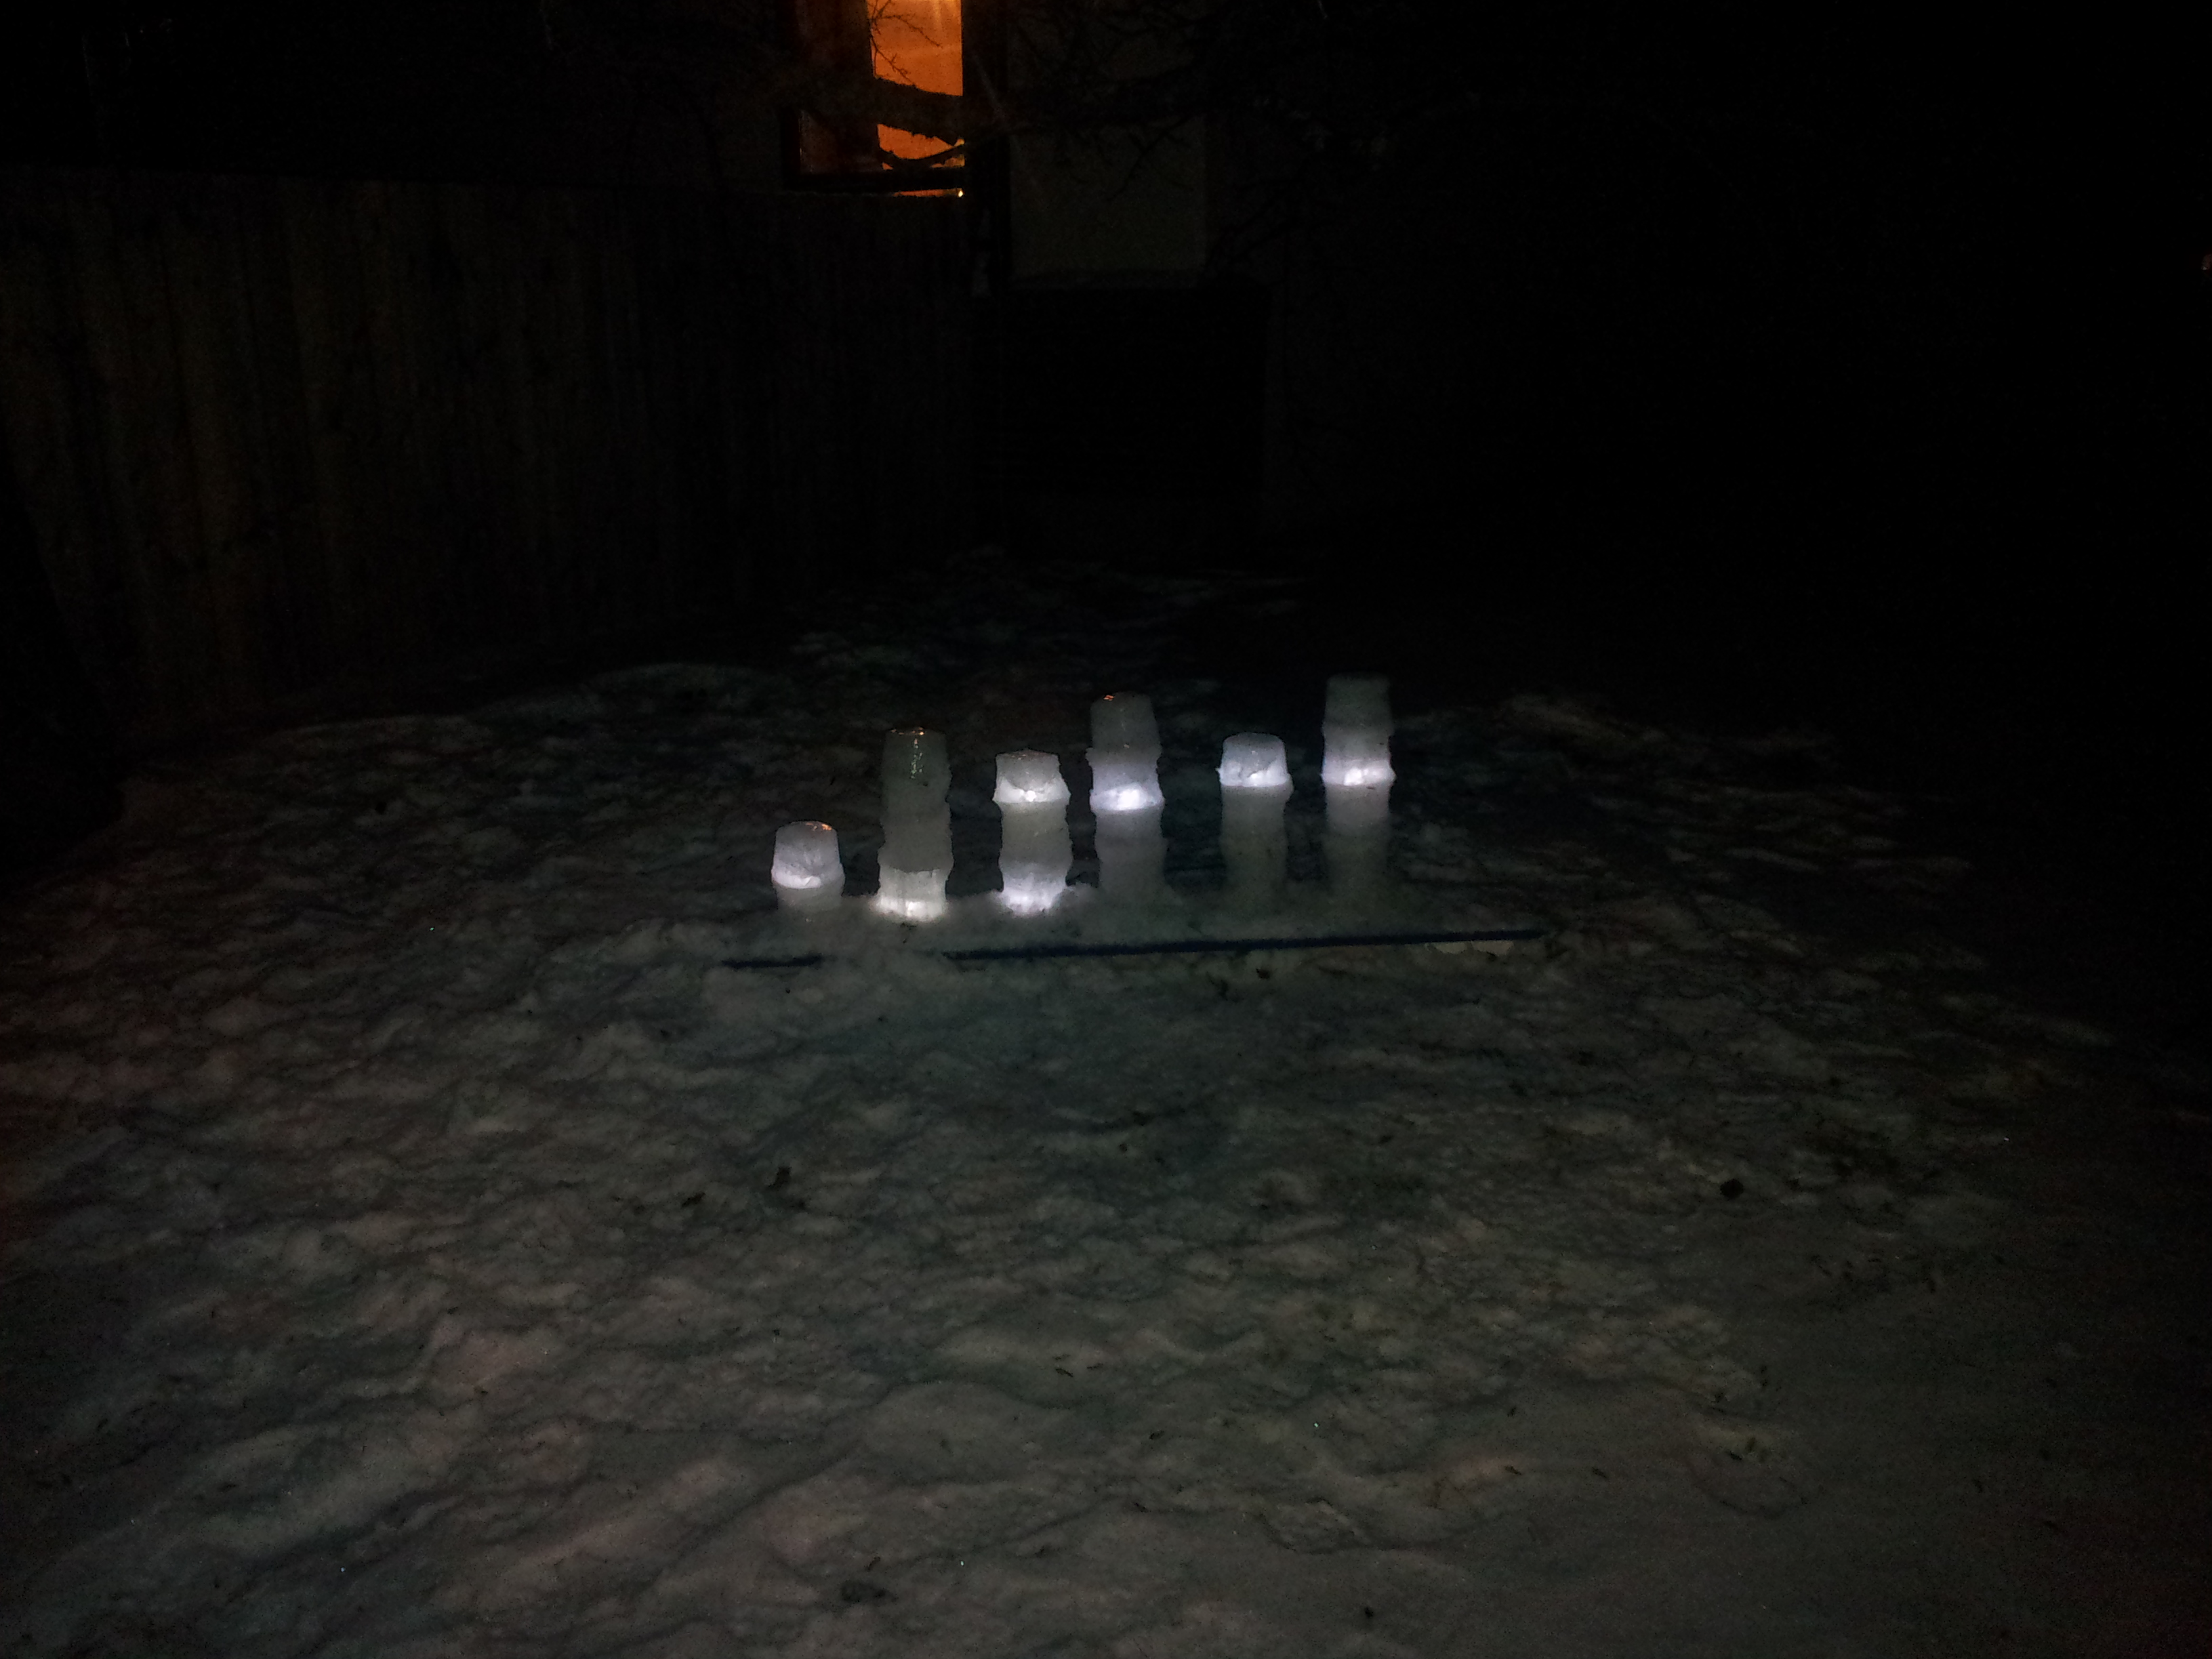
When I powered it up I was happy to see that all of the LEDs worked and there were no broken wires. I was concerned that the wires might break because I used 24AWG solid copper when I would have liked to use stranded. I'm hoping the cold doesn't make the copper to brittle to the point of breaking. It's been running for over a week now with no problems so as long as no kids disturb it, it should be fine. I made a little animation that lights up all the LED at once so I can test for any problems. Here's the Arduino sketch that I made for this project. Feel free to use it if you can find a need for it. I'm releasing it under the GNUv2.0 license.
|

